Showing posts with label How to Cook. Show all posts

March 13, 2012

Cheap Protein Sources to Consider When Planning Your Menu and Making Your Grocery List

For those living a voluntary simplicity lifestyle, being smart on the food budget is just part of maximizing the monthly disposable income.  However, in the years since I began living this way, I've seen more and more people that are simplifying their lives because they have to do it:  it's a financially necessity to live with less material stuff and a smaller budget.

These folk may not know how to cook, and they may be bummed that they have to cut back.  To them, I say - hey, there's a silver lining here!  There's fun in your future that you wouldn't have found if you hadn't had to start budgeting things.

Like learning all about cheap protein sources and using them in your menus.  There's some major good eating here as well as some very healthy things for you and yours, which someone who's eating out a lot or buying lots of prepackaged stuff or fast food take out is going to miss.

Cheap Sources of Quality Protein

The reason that you want to know cheap sources of protein is because protein can take the biggest chunk out of your monthly food budget.  Meat - beef, pork, chicken, fish - costs a lot and you buy it by the pound.  To get control of your food money for the month, it's a big target.

The silver lining is while you are buying protein options to beef, pork, chicken, fish that you are also getting some very nutritious stuff.  Stuff that can be lots better for you than the steak that you're not buying any more.
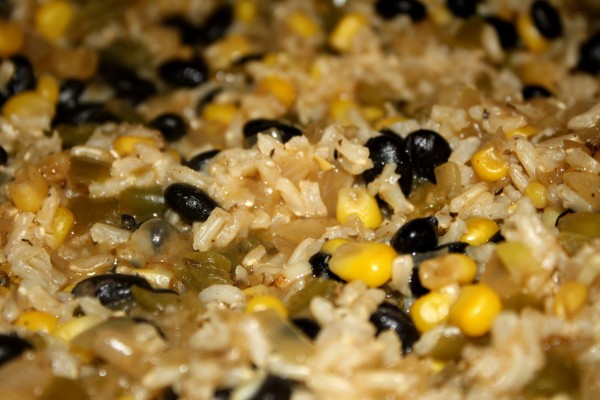

Black Beans and Rice Dish | Public Domain Image
Consider buying these cheap sources of protein (gram info from nutritiondata.self.com unless otherwise linked):

  • Eggs - 4 grams per large, fresh egg
  • Quinoa - 8 grams in a serving
  • Whey Protein Powder - 19 grams per 1 cup
  • Milk - 10 grams in a serving of nonfat, protein fortified
  • Cottage Cheese - 28 grams in 1 cup, lactose reduced
  • Greek Yogurt - 16 grams in 6 oz serving (I like Chobani Vanilla Nonfat with stevia added to it)
  • Beans and Rice - 9 grams in 1 cup of rice and beans combo
  • Soy Products  - 68 grams in 1 cup of soy nuts
  • Tempeh - 31 grams in 1 cup
  • Almonds 6 grams per ounce


And if you have to buy meat, then consider these two options before you go over to the Meat Department:
  • Canned Tuna in Water - 39 grams in 1 cup of solid white tuna in water, drained
  • Canned Mackerel - 44 grams in 1 cup of mackerel, jack, drained
  • Canned Sardines - 23 grams in 1 can of sardines packed in oil, drained
Which are Complete Proteins?

Just because a food item has lots of protein in it, you're not done.  Another consideration is whether or not it has all NINE essential amino acids in it, which then makes that food a "complete protein."

Of the items listed above, only the canned meat, the soy stuff, and the quinoa are complete proteins.  Which doesn't mean that the others aren't great, too .. just something to consider.

And yes, you can combine things to make a complete protein.  Rice and beans together, as shown above, make a complete protein.  So does smearing almond butter onto toast.

Here's the Thing: This Stuff Tastes Great.

Almonds?  They're great.  Raw, in salads, pureed into butter.  Major yum here.  Red beans and rice, or what we have here in San Antonio, pintos and rice?  Great stuff.

The greek yogurt is addicting, at least for me, when you add some stevia for sweetness and some pumpkin pie spice to the nonfat vanilla flavor.  Better than ice cream for dessert and I am not kidding you or deceiving myself.  Try it for yourself.

Quinoa?  I cook this in the microwave after learning about this on a Melissa D'Arabian show and it works great.  (Try her recipe which has 100 five star reviews at the time that I inserted this hyperlink for her lentil quinoa salad.)  And you can buy this seed, it's not a grain, made into all sorts of pasta shapes at World Market, among other places.  Elbow.  Spaghetti. 

You get the idea.  Simple living is just filled with all these discoveries.  You really do say "wow" a lot, and I'm still doing it after all these years.  It's fun!


January 6, 2012

Television Benefit: Melissa D’Arabian and Her Ten Dollar Dinners – Great Food Fast and Cheap

Television.  It can be so good or so bad, depending upon how you use it.  I suppose this is true for most things, now that I think about it.  One of the great things about TV for me, at least, are the cooking shows.  I have truly learned how to cook from watching PBS shows like America’s Test Kitchen and other channel shows (I like Mad Hungry but I don’t follow it regularly).

However, there is one cooking show that I think stands head and shoulders above the rest, from a simplicity perspective.  It delivers on a promise to feed four a complete dinner for ten bucks and with good, tasty food to boot. 

It’s Ten Dollar Dinners with cook Melissa D’Arabian on the Food Network. 

What’s the big deal?

Well, the recipes don’t taste good, they taste great.  And they don’t take many ingredients.  (Good for time and for money.) And they are easy to put together.  It’s simple living in a kitchen. 

Now, you can follow the recipes online or in Melissa D’Arabian’s cookbook and that’s fine.  That will get you there.  There’s an added benefit of watching her TV shows, though.  Maybe more than one.

In her show, where she’s cooking a $10 Dinner on the TV screen, Melissa D’Arabian adds tips and tricks that are great and that you don’t get in the books or recipes.  Thinks like buy up Italian sausage when it’s on sale and freeze it.  Buy milk that’s about to hit its expiration date by going to the grocery store early in the morning (she goes around nine o’clock) – if your family drinks dairy. 

You get the idea, Dear Reader.

I am a big, big fan of Ten Dollar Dinners and Melissa D’Arabian and I think, Dear Reader, you might like what she’s doing, too. 

January 4, 2012

Poached Eggs: Cheap, Fast, and Easy to Cook

First things first, eggs have their critics but ignore them right now because poached eggs are a good thing to know how to cook.  And poached eggs are a great thing to have in your family menu plan. 

They are cheap.  They are easy. And poached eggs can be used in so many ways: breakfast, lunch, and dinner.

Here’s the thing:  they can be hard to do.  Some say.  I haven’t had a big problem – but I do a couple of things that help.  First, I never think I am so clever at cooking that I can just dump an egg into the water.  I always use a little cup to gently lower the egg into the pool.  One at a time.  Slowly.

Also, I don’t let the water boil … I let the water get just … about … to boiling, then the eggs go into the bath. 

And, I’ve done it without vinegar.  It will work if you don’t have vinegar handy.  (I’ve also used rice vinegar, balsamic vinegar, whatever was in the pantry, and things turned out fine.  You so have a taste difference, but that’s not a bad thing.)

Here’s the deal.  Eggs are cheap. Poaching means no fat to cook them.  And the runny centers are KEY to how these things can spark up a salad or a sandwich. 

For more:

Here’s step by step instructions on poaching.

Here’s a recipe for a great salad using poached eggs.

As for sandwiches, I like a runny sandwich (wet, to coin a famous author of murder mysteries).  I like to take great bread, homegrown tomatoes, thinly sliced cheese, some dijon mustard or yes some Miracle Whip or both, lotsa romaine lettuce, and get all that ready for a poached egg to set on top.  Smush together.  The egg oozes.  It’s hot, it’s oh so good.  And doesn’t cost much. 

Yum. 

November 5, 2010

Video: How to Cook Turkey Breast and Gravy in a CrockPot by Betty's Kitchen

This is a great video and I love Betty! I'm going to be watching lots of her other 700+instructional videos on YouTube at Betty's Kitchen. She gives lots of good tips as she goes along, great stuff. Here's Betty teaching us how to cook turkey and gravy in a crock pot. Love this:

November 4, 2010

Five Tips for Breaking the Fast Food Habit

Fast food, as general rule, is bad for you and yours - we all know it, and still you drive by any fast-food joint, and there is at least one car there at the drive through window.  Not to mention those cars setting in the parking lot, with families inside eat bad stuff.  Again. 

Simplifying your life means changing your life style, to live more abundantly at less expense in time and money.  One way to do that is to cut that fast food habit.  Here are five tips to help you do that:

1.  Limit Where You Will Buy Fast Food

Some fast food is healthier than others.  El Pollo Loco, Bill Miller BBQ, Luby's Cafeteria are three local options that include healthy and fresh items on their menus. 

Avoid the golden arches and their progeny -- which reminds me, check out this May 2010 Happy Meal Rotting Experiment by a Chinese college student, where the meat did succumb to mold but the french fries simply hardened into something akin to petrified wood?  Check out how the fry is holding up the free weight, wow.

2.  Declare Fast Food to be a Weekly Treat, Give It a Theme

Make Friday night family time, lotsa folks do this already.  It's the end of the week, the beginning of the weekend.  Perfect time to have fast food for dinner: but return it to its origins of yesteryear. 

In decades past, fast food was not part of the daily menu; instead, families looked at fast food as a special time.  Mom didn't have to cook that meal, kids got to get little toys or play in the playyard. 

Get the pizza.  Extra thin crust and lots of veggies, you aren't going to be doing too badly nutrition-wise.  Get Chinese, ask that they skip the MSG.  You get the idea. 

Add a movie or a game, and presto, it's Family Movie Night, the Gang's Game Night:  a good family tradition and you've put fast food back in a corner.  (Though it's like bamboo, you gotta keep cutting it back, because it will always want to take over.)

3.  If you gotta buy fast food, skip the drinks. And the fries.

If you gotta have your burger / taco / chicken fix, then don't let them push the combo (much less the super-sizing of the darn thing) upon you.  You can buy just the sandwich, just the tacos, just the chicken.  The fries and the soda aren't mandatory.  Skip them.  There's nothing good in there for you.  Get bottled water, take the food home and drink the tea you've made and stored in the fridge. 

4.  Cook at Home, But Use Paper Plates, Plastic Silverware, Disposable Glassware

No, this isn't the greenest idea - but it's a good tip for transitioning away from a fast food habit.  Breaking down the fast food dependency sometimes means that avoiding clean up after a long day is just as enticing as the idea that you're avoiding cooking. 

Over time, maybe you will wean yourself from the disposable option; until that happens, buy the biodegradable stuff and forgidaboutit.  And don't ponder that you're spending a little more here that is unnecessary since you've got glasses and plates and things.  Sure you do; but this isn't a recommendation to swear off your pretty stuff. 

I'm recommending using disposable stuff as something you tell yourself you get to use when you're driving home and you're tired, and the drive-thru is oh so tempting.  Plus, if you keep on hand the plates and things with your kid's favorite movie theme or cartoon character (bargains here at DollarTree and PartyCity) then you may get your picky eater to eat a bit more veggies if he's got a special plate. 

5.  Have 2-3 Meals That are Five Minutes or Less to Get on the Table Always Ready to Go

Know in advance that you are gonna want to buy fast food, and prepare for battle.  If you're buying fast food because you don't want to cook, and well, it's just plain FAST, then there's the key. 

You need a few fast and easy at home meals ready to go.  Here's a couple of suggestions - all from stuff you should keep on hand, once you go to the grocery in preparation for your Fast Food Fight:

a.  Breakfast at Dinner - I have a friend who is a single mom and this is one of her standbys.  She scambles some eggs, pops toast in the toaster, lets the kids slam their own jam on the toast (big deal for these little ones), and she has dinner on the table in five minutes.  Literally.  Almond milk to drink, and she's done.

b. The Tray - The goal of a meal is to get nutrition - FUEL - into your body.  No one says that it has to be a formal June Cleaver dinner every time.  Get a platter and remember the Italians are so, so smart.  Have your own version of antipasto (cheese, meat, bread or crackers, olives, pickles, etc.) as your meal.  Or have a fruit and cheese selection.  Throw some nuts in there, and you're all set.

c. The Smoothie - Forget forks and go for the liquid meal.  Juice stuff together. Blend protein powder and whatever.  Yogurt, fruit, whatever.  You've probably got stuff in your kitchen that you can pulverize into a nice frothy drink right now.  Fast, tasty, and good for you.

October 6, 2010

Toaster Ovens: I Love Them and I Have to Buy a New One Today (darn)

For a couple of years now, I've used my trusty Black & Decker Toaster Oven on a regular basis.  It's been great: saves energy, keeps the kitchen lots cooler than using the oven, and it's easy to use. 

However, just as I was placing a batch of Crescent Rolls in Old Faithful, my handy-dandy toaster oven died.  Yes, I admit it:  I was baking up a batch of the totally bad-for-you bop on the counter tube kind.  The kids love them, and I'm weak.  Fine, fine: I love them too.  We don't eat them all the time!!!! 

So, I went on the hunt via the web, of course, for a replacement.  And today, I'll be replacing my small kitchen appliance with a GE Convection Toaster Oven from Walmart that will cost me less than $50, has literally hundreds of glowing reviews at both the Walmart site as well as Amazon.com, and get this: it has a rotisserie included!

That's right.  I'm gonna be able to have rotisserie chicken, roast, or turkey breast made here at home.  From a product that cost less that fifty bucks!!  Wowser.  Happy Dance.

Now, there's a catch.  It can't be a BIG rotisserie chicken or roast or whatever.  I've got a 5 pound limit.  But that's okay.  That's doable.

So, folks, here I go -- off to Walmart for my new gizmo.  Simple life, simple excitement. 

And guess what I'm making for dinner? 

April 9, 2010

How to Make Homemade Flour Tortillas

Once again, I've offered to bring goodies this weekend, and I'm really, really wanting to make my own flour tortillas this time. Now, I've got Mexican-American friends that have shared their expertise with me. I'm dense, I'm not a natural baker, my tortillas just never turned out right no matter how many notes I took as they gave their instructions.

I'm hoping to do better, because of this great video AbrahamDiaz19 has shared on YouTube. Not only is it easy to follow, it uses the stuff I've already got and I don't have to go borrow my friend's tortilla smasher-thingie (the silver metal tool that smuches the dough ball into a flat circle.

One caveat: I've been told that for truly authentic tortillas, you'd use LARD here, not the Crisco or the veggie oil. Just so you know.


April 7, 2010

All Natural Dog Biscuits That My Dogs Love, Love, Love

First, let me admit that my dogs have no choice: they have to live the Simplicity Lifestyle right along with me.  Which means none of those artificially-flavored bacon things, commercial dry food made with filler, well - you get the drift. 

This doesn't mean that they don't get treats.  Treats are big around here.  Even the word "treat" is very popular....

When I have time, I like to make the treats.  That way, I know exactly what goes into the batch, and I can cater the batch to their likes and dislikes.  Shocking though it may be, one of my pups isn't fond of peanut butter.  The other pup, finicky about fish.  You get the idea.

1.  My Source for Homemade Dog Treat Recipes

For the past few months, when I've looked for dog biscuit recipes, or other forms of treats, I've gone to Bullwrinkle.Com and combed through their big list of free recipes.  I do alter things a bit.  For example:

Fido's Favorite Treats (With My Alterations and Comments)

1 cup rolled oats
(I use Bob's Red Mill Organic Scottish Oatmeal, which I understand may be different from the rolled oats.  Why?  Because this is the oatmeal I keep in the pantry.)

1/3 cup margarine or butter
(Never, ever, ever do I use margarine.  Never buy this bad stuff.  I use unsalted butter. It's what's in the fridge.)

1 cup boiling water

3/4 cup cornmeal
(I use yellow or white, whatever I have on hand.)

1 tablespoon sugar
(I tried Stevia.  Didn't work well.  I tried honey.  Did okay.)

April 6, 2010

Use Your George Foreman Grill - It's Easy and Healthy: Watch This Video

Using your George Foreman Grill not only saves time, but it saves energy, cooks healthier food, and it keeps the kitchen lots cooler -- and thanks to DarkShadow1955 at YouTube, here's a great video to see how its done by real people, not Infomercial Hosts or pro chefs:

March 30, 2010

Natural Easter Egg Dyes - Organic Dyes for Eggs at Easter or Anytime

There's lots of ways to get pretty colors on those Easter Eggs without using the artificial dyes that are being sold everywhere right now.  Not only does this use stuff you already have on hand, but there's none of those nasty chemicals aka "artificial colors" to soak into your egg. 

Now, be forewarded, when I did this, my eggs did turn out with colors that weren't as intense as the box-dye produces.  More pastel?  Faint? Pale?  Not sure the word to use, but you get the idea.  I thought they were just fine, especially since they are natural and organic.  I did use white eggs, not brown, maybe that made a difference, I dunno.  And, the longer you let them hang in the dye liquid, the darker they get, so the shade of my eggs may hint about the extent of my patience ....

Here's what I did to create some basic dyes for eggs that I found work well, I'm sure you can think of even more, Dear Reader!  Now, my All-Natural Easter Egg Dye Experience:

1.  The Eggs.

First things first, this assumes that you've hard-boiled your eggs in vinegar water (at least 1 Tablespoon in your boiling pot, more won't hurt).  And after you've left them cool, you've checked your Egg Batch for cracks and pulled those out to eat as a snack, put into a salad, whatever.  (The vinegar water won't make them taste funny, of course.  It's in the water to help make the eggshells amenable to taking color.)

2.  The Prep Area.

Okay, now get yourself ready for coloring your eggs the natural way.  Your going to be using stuff that will change the color of the eggshell and this means it will also change the color of your tablecloth, placemat, HAND, etc. so prepare your work station carefully. 

3. The Tools.

Now, for the tools you'll need.  I bought some throwaway plastic bowls (not very eco-friendly or frugal, mea culpa) to hold the dye and the eggs so I could just toss them later.  If I'd thought ahead, I would have saved some containers for this -- like the bottom halves of soymilk cartons, things like that.  Anything that can handle the heat of boiling water and the task of setting there for up to an hour with some eggs in it.  I also used an old strainer that I never need during the week - one of those littler ones that may have been for loose tea in a tea pot.  And a wooden cutting board (it did get stained by this process a bit), as well as a knife, a metal spoon, a ladle, and the big boiling pot, of course. 

4. The Natural Easter Egg Dyes.

I made four colors.  I left the eggs in the dye for around an hour, till they had the color I wanted.  Doing this in rounds did take some time, but that's why God made laundry, dust, etc. Also, I used some of the white vinegar from my humungous White Vinegar bottle that I got at Sam's Club -- cuz I use white vinegar all the time in housecleaning, and I didn't know how the Apple Cider Vinegar would work here since it has the mother in it, and those little granules might mess with the surface of the eggshell during dying ....

Blue

I used blueberries.  I took a bag of frozen blueberries, thawed that sucker, and then pluverized them into a pulp. Then I added a T of vinegar to them, mushed some more.  Finally, I strained them into one of my little plastic bowls, ladled some boiling water into them, and carefully lowered a couple of boiled eggs into the bowl with my metal spoon.

Pink

I used canned beets.  1 whole can.  Same procedure as above.

Yellow

I used tumeric. I got the spice awhile back at Central Market, and quickly discovered it liked to try and turn everything it touched yellow so I figured why not let it go crazy with some eggs, right?  Here, I didn't need to pulverize anything.  I just took a heaping tablespoon or FOUR and put that into the bowl and made sure it was fully dissolved in the boiling water -- and I added some vinegar in here, too.  Maybe a tablespoon.  I know I added the vinegar to the egg water, but I put some in the dye water, too, "just cuz" as my cousin MaryBeth used to say. 

Brown

I used coffee.  Old coffee from the coffee pot.  Touch of vinegar.  Boiling hot.  Actually, the eggs came out a little beige, or khaki, but they looked nice in the basket once they were done. 

Green

I mixed the blue dye and the yellow dye until I got a shade I liked. 

Orange

Dip an egg you've dyed yellow into the bowl of beet dye till it turns the shade of orange you desire.  Actually, you're dipping yellow into pink because the beets don't really make a dark red color.  But, heck, roaming thru the pantry, fridge, and freezer, I couldn't figure out a source for red, and I got something in the orange-family when I did this, so go figure.  If you, Dear Reader, discover a natural source of deep red, I'd love to know. 


Whew!  Now, I just made my eggs solid colors, nothing fancy.  However, you could wrap your eggs with rubber bands before dunking them in the dye bowl and then take the band off after the egg had dried, for a nice effect.  Stickers, same idea.  And of course, after they're done you and the kiddos can decorate them all sorts of ways.

Image:  Egg Hunt, from FreeClipArtNow.com, public domain.

January 26, 2010

Reba's Thai Peanut Pasta

There are times when you need to cook something up and you don't have time - or the desire - to run to the store. Company's coming and it's not part of the weekly menu/budget plan.

If you keep a stocked pantry (see earlier posts on that), then you can have the thrill of being able to throw something together that tastes great from the stuff you find on your shelves, and in your fridge. Plus, you get that amazing feeling of creating something ... and a mysterious appreciation for the Iron Chef America competitions.

Here's what I brewed up over the weekend, and it was lick the bowl good:

Reba's Thai Peanut Pasta

1.5 cups peanut butter
1/2 cup coconut milk
3 T soy sauce
4 T water (play with this, you don't want it too thick or too runny)
Tabasco or red pepper flakes to taste (whichever is in the pantry)
1 T minced ginger (fresh is good, I used the crystalized ginger from the fridge because that's what I had)
3 garlic cloves, finely minced
1 bunch cilantro, coarsely chopped leaves
2 chopped scallions
pasta that you've got on hand (I used wide fett noodles b/c that was in the pantry)

Mix all this stuff together except for the peanuts, 1/2 of the cilantro 1 of the scallions, and the pasta. When you're ready to serve the stuff, cook the pasta al dente, heat the peanut sauce, toss them together. Scatter the held-back cilantro and scallions along with the peanuts over the top. Yum.

(This peanut sauce is good over chicken too, cut up the cooked chicken, toss with the sauce, use the same toppers (the peanuts and such) and serve over a bed of rice.)

January 23, 2010

Is Butter Good for You? Yes.

Is butter good for you? Butter's got a lot of bad press in the past, but was that all wrong? Maybe so.

First of all, let's consider butter in all its forms. Basically, butter is cream after you've churned it for awhile. Churned meaning stirred steadily, kept it moving. You've seen those old butter churns in the antique shops. Usually, this cream is from a cow.

Types of Butter

After that, there are different types of butter. Organic butter leaves it at that: churn the cream, you're done. Organic butter also uses cream from cows that have been fed carefully, i.e., organic cream is the basis.  Sometimes, buttermakers add yellow food coloring to the butter.

Sometimes, they add salt - salted butter was necessary long ago, to keep the butter from spoiling. European-style butter is regular butter, but a live culture is added to the cream before it's churned.  This not only makes it friendlier to sensitive digestive systems, it makes the butter sweeter, too.  Used a lot in baking.  The most popular type of butter in the United States is unsweetened, unsalted, uncultured butter -- sometimes labelled "sweet cream butter," it's the basic stuff.  Whipped butter has had nitrogen added to it, so that it's texture is altered and it is easier to spread. 

Butter is Fatty - But That's Not All

A couple of years back, butter got a bad reputation for having lots of those evil trans-fats in it.  That's true, pound for pound, if you compare butter to red meat.  But no one eats that much butter in one setting, and one tablespoon of butter has a scant .39 grams of trans-fat in it. 

Meanwhile, butter also carries with it lots of very good things.  Butter is an excellent source of Vitamin A, Vitamin E and selenium.  It also contains lecithin and several anti-oxidants, and components of real butter have anti-cancer properties. 

So go ahead, have that butter on your toast.  It's good for you.  

January 19, 2010

Pot of Beans on a Wintery Day - Reba's Tex-Mex Pinto Bean Recipe

I remember going to visit my uncle when I was very little, the one who was named for an Indian Chief and therefore, very mysterious and all-knowing.  My parents, uncle, and aunt would all set in the kitchen while we kids played out back, with the big dog, Monster, and the little runt, Pretty.  They'd drink coffee or iced tea, and periodically we kids would hear all of them laughing together - the sounds of my dad's big guffaw bouncing out of the screen door and into the back yard, under the pecan trees where we huddled in the low-lying branches.  And all the while, setting on the back burner of the stove in my uncle's special clay Bean Pot were his special pinto beans. 

I can never remember a visit where those pinto beans weren't bubbling in the background, rain or shine, summer or winter.  Perhaps it was because my uncle (the oldest of many brothers, my dad being somewhere in the middle) had lived through the Great Depression (you know, the first one) and it was a good thing to always have something tasty cooking on the stove. 

Over the years, I've monkeyed with his basic bean brew.  Basically, I've added some "Mex" to the "Tex" and I think my uncle would approve -- and I know that lotsa folks ask me how I make these beans, so I'm thinking they're worth you giving them a try.  Maybe my fond childhood memories do sway me, but there is something very nice about having a pot of beans simmering on the stove when its a grey, chilly afternoon that makes everything cozy and nice.  Peaceful, even. 

Reba's Tex Mex Pinto Beans

2 pounds pinto beans, dried (soaked overnight after being culled through for rocks or bits of dirt)
1 package bacon, chopped into bite-sized pieces
1 bunch cilantro, leaves chopped and stems discarded
3 big tomatoes (homegrown is best, use 4 if you go with Roma or a smaller fruit)
1 Texas Sweet onion, chopped into bite-sized pieces
2 serrano chilis (seed them even if you like fire, otherwise they'll take over the pot), chopped fine
2 garlic cloves, chopped fine
1 T comino
1 T chili powder
salt and pepper to taste

It's really important to get the dried beans right.  Soak them overnight means a good 12 hours, and making sure that you've checked for the rocks and things.  Drain off the water that they soaked in.  Don't use it.

Put the beans in your big pot, cover with water.  Add enough so there's a good couple of inches of water above the beans, give them room to move.  Bring the water to a boil, then lower your heat so that it's a very low simmer. 

Now, add all the ingredients listed above, except for the cilantro.  And yes, you'll want to use fresh cilantro.  Some may tell you that dried coriander and fresh cilantro are the same thing, but I don't believe it.  They taste different.  Go with the fresh cilantro here.  And no, you don't cook the bacon before you put it in the pot.  That bacon swimming thru there flavors the beans and no, there isn't a fat layer on the top when the beans are done.  I never said these were low-cal beans. 

Add more water to the boil as needed so they don't boil dry.  If you're losing water too fast, your flame is too high.  You want these to cook slowly, let all the flavors meld. 

These are great with homemade cornbread, just by themselves in a bowl, or you can serve them as a side with things like barbequed brisket (the Tex part) or cheese enchiladas (the Mex part).  Yum, yum. 

March 29, 2009

I Cooked a Pork Tenderloin ($1.79/lb) - Here's How


Pork tenderloin was cheaper than chicken at the store today, so I bought one. I've never been a big pork fan, but I may change my mind. This was very easy to cook, didn't take long, and it turned out fabulous.

This video shows how to cook a tenderloin -- and I like this video because she did what I did: I just put that baby in the oven. No throwing it into a frying pan first to get some saute action going. No sirreebob and I don't think foregoing that step was a problem at all.

Tex-Mex hint on leftovers: take a corn tortilla, put in some pork, a couple of avocado slices, some cilantro, and some shredded cabbage. Fabo taco. Addicting. Truly.

January 16, 2009

Cheap Eats and Frugal Recipes: Beer Biscuits

The biscuits in the tube are cheap, and it's fun to bang them against the counter to open 'em up, but what if you want to try your hand at cooking some the old fashioned way?

If you're new to baking, or don't have much time, then try drop biscuits (because you don't have to roll out the dough and cut out the little circles with a cutter) and start your trek using biscuit mix instead of buying all the separate ingredients (you'll move up soon enough, this stuff is fun).

You'll still need a nice baking sheet, a good hot oven, and a few ingredients - but not much. Here are two of my favorites -- they are so easy, and they taste great.

Paula Deen's Beer Biscuit Recipe

Here, Paula credits her brother Bubba for the recipe. All you need is a can of beer, a pat of butter, a 1/4 cup of sugar, and a box of Biscuit Mix (you'll need 4 cups) and you're ready to go. You stir all this together, dump them in muffin tins (I just spoon blobs onto a cookie sheet), and bake till golden in a 400 degree oven.

How easy is that?

And what's great here is all the ingredients can be on hand in your pantry, when you're ready - assuming that you keep butter in the fridge. It's the only perishable here. If you're stocked up, then you're not running to the store for a darn thing.

There's a recipe over at Cajun Recipes that makes it even simpler than this. And that's saying something, right?

They're taking 3 cups of biscuit mix, that same can of beer (it's your leavening agent), and 2 tablespoons of sugar. Period. Mixing all that together, and shaping the dough into biscuits, baking 'em at 375 until golden brown.

Wow, that's easy and fast.


October 23, 2008

Cheap Eats and Frugal Recipes: Rice


Rice is great for a food budget. First, rice is cheap. Once cooked, it feeds a lot - you get a lot of bang for your buck.

Plus, rice is easy to prepare and to store. You can also freeze rice by itself, along with most rice recipes (depends on the other ingredients). It can be savory or sweet; a side dish or an entree or a dessert.

Brown rice, or whole-grain or wild rice is very nutritious - much more so than the more familar white rice versions. Put rice with beans, and you create a complete protein, too.

Basic Rice Recipe -- How to Cook Rice

1. Rinse your rice 2-3 times before it goes into the pot. This gets rid of excess starch on the kernels, helping to prevent sticky rice as well as rice stuck and burned on the bottom of the pan.

2. If you have time, soak your rice in some water. Makes it plumper on the plate. This is really a must for whole grain (brown) rice -- soak it for a couple of hours, makes a big difference.

3. Don't use that Minute Rice or Precooked stuff. You don't need it, it doesn't taste as good, has less nutrition, and costs more.

4. Use a pot that has a tight fitting lid (steam is crucial to cooking rice) and a nice heavy construction. Me, I like my ceramic-covered cast iron pot ....

5. Some say not to salt or butter the rice while it's cooking. I ignore them. I salt the boiling water, and I add a couple of tablespoons of butter, or olive oil, for taste. I might throw in a garlic clove on a whim. You get the idea. Depends on what I'm using the rice for -- olive oil, for example, isn't really good if I'm going for a dessert if you know what I mean.

6. Older rice takes longer to cook than fresh rice. It's doable, though, just needs more time in the pot. Best if you've stored your rice in a tight jar in the pantry (air tight).

7. How much water? Put in 1.5 cups of water (one and a half cups) for each cup of white rice, 2.5 cups for wild rice. Yes, you can substitute stock for this - chicken, pork, whatever.

8. Put the rice and water on the stove and bring it to a boil over medium heat. (Some folk put whole grain rice into a hot, dry skillet and let it "fry" for a bit before combining it with the water - I might do this if I have time, and I always do this if I'm making Spanish Rice because it adds a little crunch to the dish.)

9. Add the butter and salt.

10. Turn the heat down to low and put the lid on tight.

11. After about 15 minutes, check the white rice. If it looks done, there's no liquid in the pot, and there are little holes that have popped up on the surface, you're done. Whole grain, or wild rice, takes a lot longer because it hasn't had its outer covering stripped away. It's going to take about 45 minutes to cook.

12. Remember, it's not criminal to pop up that lid and check on things - particularly when you're just getting started here. Sure, steam will escape but that's not going to be the end of the world. Stir the rice around, check your liquid levels -- if it's even hinting at burning on the bottom, you've got the heat too high.

13. Key to rice: low heat and patience.

14. Cheap, frugal rice dishes? Chicken and Rice, Broccoli Rice Casserole, Chicken Fried Rice, Spanish Rice, Rice Pudding, Rice-Stuffed Bell Peppers, Rice and Bean Cakes, and any sort of Chinese Stir Fry with veggies on hand come to mind ... rice is used a lot around here.

15. For more rice recipes, surf around these sites and see what tickles your fancy:

Recipes.LovetoKnow.Com - Rice

All Recipes.Com - Rice

16. Don't forget the chop sticks!!! Rice is the great excuse to use them - makes for a fun meal.

October 22, 2008

Sweet Drinks With Stevia


In an earlier post (link shown below), I reported on the new beverages that will be hitting our grocery shelves, sweetened with stevia. Coca-Cola, Pepsi-Cola, and other companies are on the bandwagon. (This, after they've been selling their products using stevia in Japan for years. Arggg!!! But I digress....)

In the meantime, I thought I'd share several beverages that are pretty popular around here on the homefront, made with all-natural, no calorie Stevia (I use the KAL brand):

1. sweet tea (I brew tea, then add ten "shakes" of the KAL powdered stevia, or about ten eyedroppers of the liquid KAL version, then fill the gallon pitcher with filtered water);

2. Kool-Aid (yep, just use the unsweetened packages)(same amount of stevia as above);

3. limeade (I juice around 5 large limes, 7 smaller ones)(same amount of stevia as above, also for the gallon pitcher);

4. pink lemonade (for one gallon, I use around 4 lemons, 1 package of KoolAid unsweetened strawberry mix, and the same amount of stevia as above);

5. iced coffee (for one serving, mix fat free half-and-half - or soy milk - and good coffee till the color is right, then add two shakes of the powdered stevia - or more, sweeten to your taste -- I find that powdered stevia works better than liquid here, for some reason; pour over ice)(sometimes I add some real vanilla extract or a touch of cinnamon before the ice goes in).

Yep, I've started using liquid stevia as well as the powdered version. Why? Got a great deal for liquid KAL brand on sale at Sun Harvest, of course. Just scooped them up and figured I'd learn to like the liquid, too.

For More Information:

Stevia Goes Mainstream

August 27, 2008

5 GOOD CHEAP RECIPE COLLECTIONS

There are some sites that discuss eating healthy, eating organic, eating frugally -- but what about some recipe collections where the food is good and the cost is almost pennies?

Here are five online recipe collections with really good and CHEAP recipes:

Miserly Moms' Frugal Recipes
Cheap Eats - $3 or Less
Budget 101's Dirt Cheap Ramen Noodle Recipes
Recession Recipes
Cheap Recipes at Gather.Com

Granted, some of the ingredients may include processed food (for example, canned biscuits in the Miserly Moms' Cheesy Pull-Apart Biscuits, Recipe No. 184) and they may include food with debatable nutrients (e.g., the iceberg lettuce in Recession Recipes' Iceberg Lettuce Soup), but you can always play around with these recipes -- one of the fun things about cooking anyway -- to suit yourself.

For example, cabbage is cheap and very nutrious. Maybe you substitute that for the iceberg lettuce in the soup recipe. Or you take the time to make biscuits from scratch - anything processed costs more, so you'd theoretically be saving even more money if you circumvented the canned biscuit dough....

These collections give you more than just the recipes themselves. If you go surfing through them, you'll discover themes and patterns that will help you a better shopper and a better cook. Study them, and you'll learn more than just a new dish for the family menu.

For more information:

How to Cook 4: Beans Are Easy, Cheap, and Good
Menu Planning 102
Menu Planning 101

August 4, 2008

Stevia Goes MainStream - No Cal, All Natural Sweetener: Is It the New Splenda?

Well, it's about time. For those of us who have been using Stevia for years, we've wondered if this day would ever come. Thanks to Cargill, it has.

Stevia will be hitting the commercial store shelves this month, marketed under the name brand of "truvia." (I believe they're only selling it in packets, but I could be wrong.) Look for it packaged as SweetLeaf.

Next year, expect to see lots of marketing, with Coca-Cola having the exclusive rights to use Truvia in its beverages since it shared the Truvia development expense with Cargill. Pepsi's already in the fight - it's announced its version of stevia, PureVia, and will begin selling SoBe Life drinks sweetened with PureVia in several South American countries this week.

What's Stevia?
Stevia is a natural sweetener that has been used for years and years, which has no calories to it. It is derived from the Stevia plant, you can grow it yourself if you want to do so, and its leaves are several times sweeter than sugar.

The Japanese as well as countries in South America and Europe have seen store products sweetened with Stevia for many years. In fact, Diet Coke sweetened with stevia has been available in Japan for awhile now (check out Mark McManus 's rant about why we can't get it here in the States).

It's been a long, political path for Stevia to gain FDA acceptance here in the US ... and yes, there have been fingers pointed at both the sugar industry as well as the companies responsible for artificial sweeteners like Equal and Splenda.

Health Benefits - It's Good for You
While more and more reports are revealing concerns with the use of artificial sweeteners (particularly aspartame right now), worldwide studies have shown stevia to be beneficial to physical and mental health. Stevia has been shown to help with high blood pressure, glucose levels for diabetes, and depression. Dr. Andrew Weil and Dr. Michael Murray are big fans.

Want a soft drink sweetened with stevia right now?
Try Zevia. They'll even send you a variety six pack for free, as long as you pay shipping and handling.

Want to Buy It Now? My Favorite Brand and My Favorite Uses: Tea and Limeade.
Personally, I love stevia. I buy the KAL brand, loose powder form (it comes with its own measuring spoon inside). You can find it at health food stores like Wild Oats and Whole Foods (if KAL's not sold out ... it's the most popular stevia product at my store).

My life is better with stevia in it. Ten shakes for a gallon of iced tea. And, there's just not a better limeade around than one lime, a "stevia spoon" of stevia, water, and lots of ice.

I recommend KAL's stevia product because I do not find it to have the licorice aftertaste other brands sometimes have; plus, I think KAL gives you more bang for your buck than other brands. My KAL bottle simply lasts longer than the competition, and I use stevia all the time.

April 28, 2008

How to Cook - 4: Beans Are Easy, Cheap, Good

Beans are so humble, unless you consider the hericot vert. Always the bridesmaid and never the bride in any menu, beans are nevertheless so varied, so favorful, so nutritious, and so cheap, that they're just plain smart to buy and serve your family.

How to Cook Beans

1. The Traditional Way.
My mother taught me to pour the bag of beans onto the kitchen table, and to slowly pull bean by bean off the edge and into a large, deep bowl. This eliminated any small pebbles that managed their way into the packaging. Once the beans were safely culled and transferred into the big bowl, the bowl was filled with water, covered with a cheesecloth, and left to set overnight.

The next day, the beans would have puffed up with all the water, and they were ready for the big Bean Pot. (Yep, my mom had a special pot just for beans. Here in Texas, refried beans and pinto beans are important parts of both TexMex meals as well as any respectable barbeque.)

The beans were drained and placed into the pot (draining being important to stave off (ahem) gas (ahem), and seasonings were added. After being brought to a boil, the heat was lowered and the beans sat on the back burner, simmering away; their smell filling the house with that great cozy feeling of something cooking on the stove. Periodically, you checked the pot and stirred the beans, adding water if it was needed, until the beans were done.

2. The Slow Cooker Way.
This is a method I've tried when I've been under a deadline and not able to watch the bean pot (yep, I have one of my own now) during the day -- or when I wake up and remember that I forgot to soak the beans. You still cull the beans, although it's been awhile since I've found a pebble in my beanbag, but you omit the overnight soak. Pour your culled beans into a large slow cooker, add your seasonings, and fill with water. Turn it to the low setting. You want lots of water here, bean juice isn't a bad thing if you've been generous on the water, but it's trouble if those beans don't have enough water here: they didn't get their soak time, and they have to hydrate. They're starting out dried, remember. Around eight hours later, you'll have a nice batch of beans.

Different Beans to Try, Seasonings to Use, Meals to Make, Why Bother

Types of beans
Pinto beans
Kidney beans
Butter beans
Black beans
Lima beans
Navy beans
Azuki beans

Seasonings
Onion
Garlic
Salt Pork
Bacon
Ham
Chicken
Chilis
Pepper
Salt
Cilantro
Tomatoes


Good Recipe Sites
Crockpot Beans - lots of recipes here
The Bean Bible

Why Beans?

Beans are among the best buys in the marketplace. They're very economical - plus they are very, very nutritious. Studies show they fight colon cancer, if eaten several times a week. Eat them with rice, and you have a complete protein substitute which is good for you and great for your budget.
Related Posts Plugin for WordPress, Blogger...